How can i create a GeoFence zone?
2 min read
Step 1: Setup Zone.
In order to create a GeoFence zone from the login screen, navigate to “Places”, then go to the “Zones” tab, and finally press the “Add Zone” button, like it is shown below. The zone properties window will appear. Enter the name of the zone and choose a color in which the marker will be visible on the map.
At this point you have 2 options for the size of the zone to be either Polygon or Circle. Once you choose the layout you prefer, you have to press the “Draw Zone on map” button to start drawing the zone on the map!

Step 2: Draw Zone.
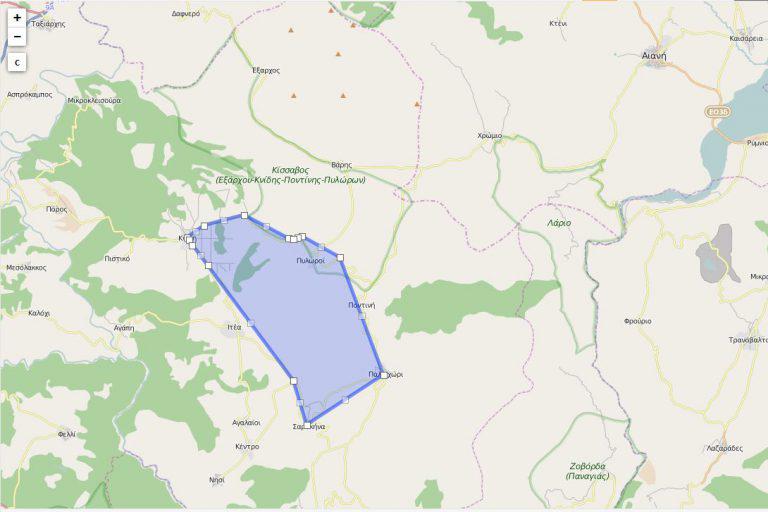
Polygon Layout: Using the cursor of your mouse, “click” on any geographical location you want to create the GeoFence zone, just like it is shown in the below figure.
NOTE: In order to draw the zone, you will need to click with the mouse the points you want to draw.
Circle Layout: If you choose to have a circle layout
for your zone, all you have to do is click on the specific area you
want to create the zone on the map, and then increase the diameter of
the circle by dragging the white square icon, as it shows in the image
below.

Step 3: Create a notification event
Now that you have created the zone you desire, you must create a notification event in order to get notified when the vehicle(s) enter or leave the area! Check here how you can create notification events!
In case you want to upload multiple zones in bulk format, you can that with a Comma Separated Value (CSV) file. You can download a sample format for the CSV file here, and then upload it through the upload button as it shows in the image below.


Powered by BetterDocs